Atmos Pro Installation
The first step to begin using Atmos Pro is to sign up for an account. Signing up for Atmos Pro is easy, just follow the steps below.
Atmos Pro uses GitHub OAuth to authenticate users. To sign up for an account, you'll need to use your GitHub account.
It's as simple as navigating to https://atmos-pro.com and
clicking the "Continue with GitHub" button.

Now that you're logged in, you'll need to create a new workspace or work with an existing workspace that you've been
invited to join.
Workspaces allow you to group your company's or team's repositories together. You can create as many workspaces as you'd
like, but for now, we recommend creating a single workspace for your team. The only requirement is that a single
repository can only be imported into one workspace.
If you aren't already a member of any workspaces, you'll be taken to the Create Workspace screen. Enter a name for your
workspace and click
Create Workspace. We recommend using your company name or company plus team name (Acme, Inc. or
Acme, Inc. Retail Operations) as the name of your workspace.
Once you've created a workspace, you'll need to install the Atmos Pro GitHub App. Click the
Install button to be taken
to GitHub, where you'll be prompted to install the Atmos Pro GitHub App.
If you're an administrator of the GitHub organization that owns the repositories you'd like to use with Atmos Pro, you
can install the Atmos Pro GitHub App by clicking the
Install and Authorize button after selecting the subset of
repositories you'd like to use with Atmos Pro.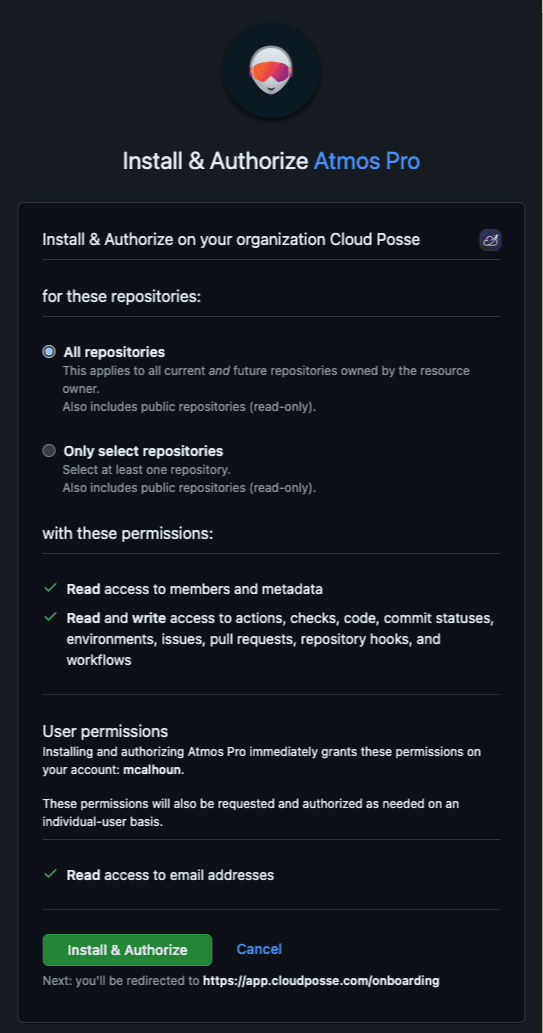
Once you've given the Atmos Pro GitHub App the permissions it needs, you can now pick which repositories you'd like to
use in Atmos Pro by importing them. Select the GitHub organization that owns the repositories from the dropdown menu,
and then click the
Import button next to any repositories you'd like to use with Atmos Pro.If you're still waiting for an administrator to approve the Atmos Pro GitHub App, or you just want to start with one or
two repositories, just click the
Done button. You have the option to add more repositories at any time from the
repositories screen within the Atmos Pro application.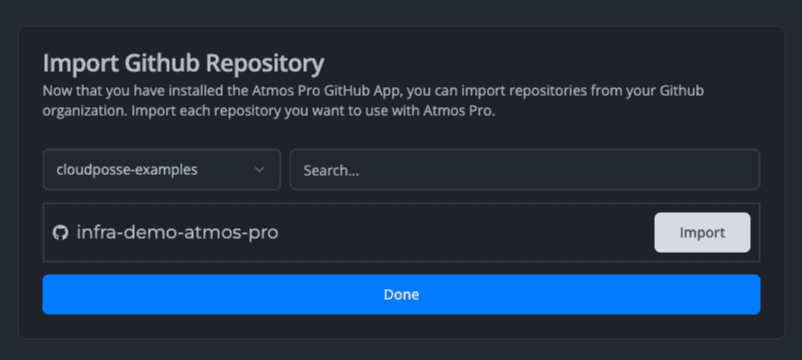
To use Atmos Pro, you'll need to make a few small changes to your
Configure Atmos Stacks
atmos.yaml configuration to define which workflows should be dispatched for each component based on the event type. The configuration tells Atmos Pro when to run plan or apply workflows for each component when changes are detected.In order for Atmos Pro to be able to dispatch your GitHub Actions workflows, you will need to make some small changes to your existing workflows or create new workflows.
Now that you've installed the Atmos Pro GitHub App and imported the repositories you'd like to use with Atmos Pro, you
can start using Atmos Pro to deploy your Atmos stacks. To learn more about Ordered Deployments, click the
Introduction
link below.Ready to get started?
You've completed the installation. Now, learn how it all works.